Introduction

The Ricoh GR III is a new high-end premium compact camera with a large sensor and fast lens that's aimed at enthusiast and professional photographers alike.
At the heart of the Ricoh GR III is an APS-C-size CMOS image sensor with 24.23 megapixels and no low-pass anti-aliasing filter. It has a 28mm fixed focal length lens with six optical elements in four groups, fast maximum aperture of f/2.8, 3-axis image stabilisation system, a nine-blade diaphragm, macro shooting capability of 6cms, and a built-in manually adjustable ND (neutral density) filter.
Still images can be recorded either as JPEGs or 14-bit RAW files in the Adobe DNG RAW format, there's 1080p video recording at 60fps, and an external hotshoe which can accept a flashgun or an optional optical viewfinder.
Full creative control over exposure is available, the ISO range is 100-102400, there's a 3-inch touchscreen LCD with 1.04-million-dot resolution, contrast and phase-detection Hybrid AF system, Wi-Fi and Bluetooth connectivity, single SD memory card slot and 2Gb built-in memory.
The Ricoh GR III is available in black for £799.99 / $899.99.
Ease of Use
Key Specifications
- 24.23 megapixel APS-C sensor, no low pass filter
- Magnesium alloy chassis
- 28mm F2.8 lens with a 9-blade aperture and integrated lens cover
- 6 elements in 4 groups to help reduce the size of the lens barrel
- 3-Axis image stabilisation, 4 stops of compensation
- ISO 100-102400
- 14-bit RAW files
- 1080p video at 60fps
- Dust Removal II system
- Anti-aliasing filter simulator to eliminate moire
- 6cm macro mode
- Fixed 3-inch touchscreen LCD with 1.04-million-dot resolution, outdoor view setting
- Hybrid AF system that uses phase and contrast detection
- 8 types of AF, including continuous AF and Face AF modes
- 10 image filters
- HDR effect
- In-camera RAW editing
- Interval shooting
- Multi-exposure mode, up to 2000 images
- 35mm and 50mm crop modes (reduced megapixels)
- Built in ND filter
- Customisable ADJ selector and Fn button
- 3 User shooting modes
- Bluetooth and wi-fi connectivity via the Ricoh ImageSync app
- 2Gb built-in memory
- USB Type C port for charging
- Single SD memory card slot
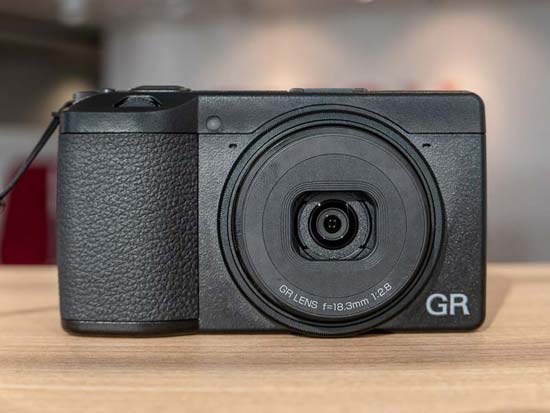 |
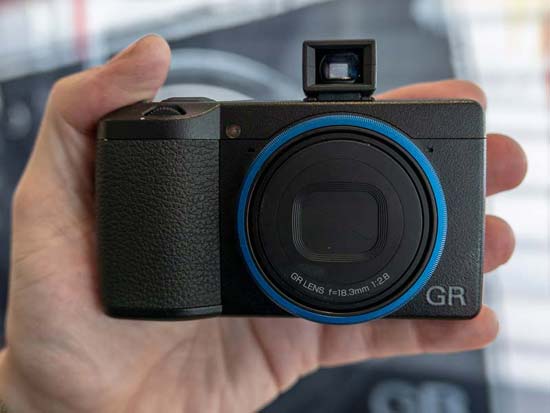
| Front of the Ricoh GR III |
The Ricoh GR III is ever so slightly smaller than its predecessor, measuring 109.4m x 61.9 x 33.2mm, but ever so slightly heavier, weighing 227g without the battery or memory card fitted. To be honest, you'd be hard pressed to notice any real difference in terms of size and weight between the two when comparing them side by side.
The GR III is a very well built camera, with a magnesium alloy chassis and very solid construction with little to no flex. It has an even more understated, unassuming appearance than the previous version, with all of the button labels and even the GR name on the front finished in a dark grey colour rather than white.
Despite its small stature, the Ricoh GR III still manages to offer a large rubberized handgrip on the front that allows you to get a really good grip with three fingers. On the rear there's an area of the same material and a slight protrusion which combine together to act as a thumb rest.
The GR III continues to feature a 28mm F2.8 wide-angle fixed focal length lens with a 9-blade aperture, which is perfect for wide-angle and street shots. Obviously this isn't the camera for you if you'd prefer a zoom lens though!
 |
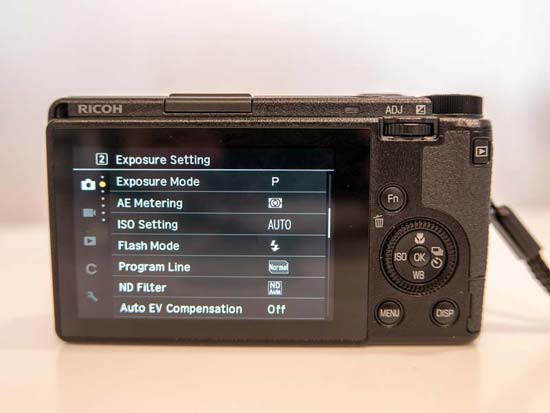
| Rear of the Ricoh GR III |
Ricoh have included 35mm and 50mm digital crop modes, which as the names suggests simulates those focal lengths by cropping into the 24 megapixel image, producing a 15 megapixel photo and 7 megapixel photo respectively, extending the versatility of the camera. Additionally, the new optional GW-4 Wide Conversion Lens can be fitted to the GR III using the GA-1 lens adapter to provide a 21mm focal length.
For the first time on this camera series, the Ricoh GR III features image stabilisation. It's not the most sophisticated system in the world, 3-Axis with 4 stops of compensation that can simply be turned On or Off, but in low-light for certain subjects it could be the difference getting a sharp shot or a blurry one, or a clean shot or a noisy one (if you'd otherwise have to increase the ISO to obtain a faster shutter-speed).
The GR III also has a built-in ND filter worth two stops (ND 0.6), which can be set to Auto, On or Off. It's quite a useful feature that allows you to shoot with a wide-open aperture in bright sunlight and still get a correctly exposed shot, or for helping to blur moving subjects such as water, or for extending longer exposures.
The Ricoh GR III features a new 24.23 megapixel APS-C-size CMOS image sensor with no low pass filter and new GR Engine 6 processor, which promises fantastic image quality for a compact camera - you can judge for yourself by looking at the full-size JPEG and RAW files on the Sample Images page of this review. There's the usual choice of Fine and Normal JPEGs, plus Adobe's DNG format, which means that the Ricoh GR III's files are instantly available in any RAW software that supports DNG (virtually every one). It also enables 14-bit RAW files for the first time on a GR camera (the GR II had 12-bit RAW files).
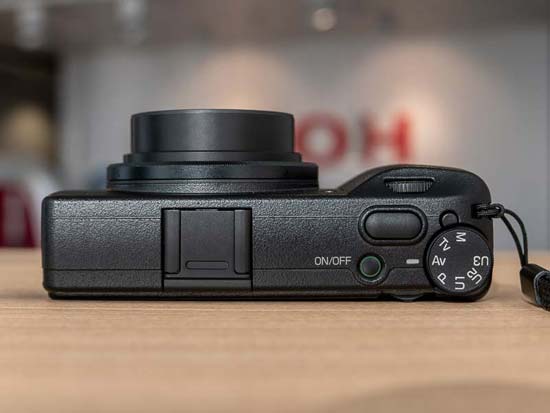 |
| Top of the Ricoh GR III |
The GR III has an increased maximum ISO speed of 102400, two stops more than on the GR II, and starts at ISO 100. While we wouldn't recommend shooting at ISO 102400 unless you can't avoid it, it does mean that the GR III has a range that's very usable from 100-6400. Cleverly you can also set a specific minimum shutter speed in Auto High ISO mode, as well as setting the upper limit of the ISO sensitivity.
Rather than an optical anti-aliasing filter in the camera, the GR III has an innovative anti-aliasing simulator instead, which can be turned off (default setting) or on to either the Low or High setting, which adjusts the level of the effect. This feature effectively provides the same level of moiré reduction as an optical AA filter.
The Ricoh GR III once again offers Full HD movie recording, but this time around does so at 60p as well as at 30/24p. During recording the camera can be set to continuously focus on the centre of the frame (manual, snap and infinity focus options are also available). Various image Effects including Retro and Bleach Bypass are available during movie recording, and the white balance can also be set, but annoyingly you still can't set the aperture or shutter speed, just like on the GR II, so you'll have to rely on the camera's exposure system when shooting video. It's fair to say that video really isn't this camera's strong point.
There are three external controls which form the creative heart of the GR III. Located on the top right of the camera are the Shooting Mode dial, the front command dial and on the back is the ADJ. dial. These controls allow you to choose which shooting mode you want to use, with a choice of program shift, aperture-priority, shutter-priority and fully manual, and to control the settings of the particular mode that you have picked. For example, in Manual mode, the front command dial sets the aperture and the Adj. dial sets the shutter speed. In the aperture-priority and shutter-priority modes, the front command dial sets the aperture/shutter speed and the Adj. dial sets the exposure compensation.
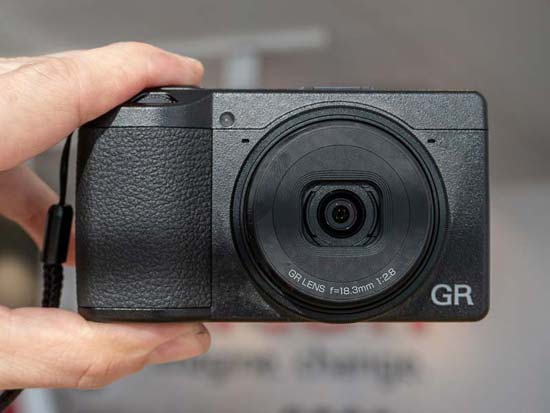 |
| The Ricoh GR III In-hand |
Furthermore, pressing the Adj. dial inwards allows you to quickly adjust five different settings that are commonly used. Press it to alter by default the Image Control, Focus, Exposure Metering, File Format and Outdoor View settings. Even better, the Adj. menu is completely customisable - you can choose what the 5 available settings do, allowing you to control exactly what you want quick access to, and you also set the Adj. dial to control the ISO speed by pressing left/right.
Continuing the customisation theme, you can configure the Ricoh GR III and save the current settings as one of three User Settings modes, which are accessible by setting the Shooting Mode dial to either the U1, U2 or U3 option. This allows you to configure the GR III for different uses and allows quick access to each configuration (the camera remembers the settings when it's turned off). The Function (Fn) button on the rear of the camera, front and rear control dials the and 4-way controller can also be customised to suit your particular way of working.
The GR III offers both wi-fi and Bluetooth connectivity. The Wi-Fi function lets you use your smartphone to change the Ricoh GR III's key settings and even fire the shutter button remotely (including video recording) using the GR Remote application, while the dedicated Image Sync application automatically backs up your photos onto a mobile device or computer. The Bluetooth connection creates a constant, low-power connection between the GR III and a smartphone/tablet to transfer images and video even when it's in Sleep Mode.
The Ricoh GR III has a 3-inch 1037K dot LCD screen on the rear, which is actually slightly lower resolution than the screen on the GR II but offers a a wider 3:2 aspect ratio. On a more positive note, the new screen is touch-sensitive, something that has never been featured before on the Ricoh GR series. It makes quite a big difference to the usability of the camera compared with earlier models, especially as it proved to be very responsive. Being able to move the focus point by simply touching and sliding the screen whilst holding the camera at arm's length is something of a revelation, for the GR series at least. You can also pinch in and out during playback to change the magnification or flick from side to side to view the previous and next images.
 |
| The Ricoh GR III's Menu System |
For the first time on the GR series, a circular control dial is positioned around the four-way navigation pad on the rear of the camera. This can be used to quickly scroll through the menu system or through your photos in image playback and select options from the various sub-menus.
If you don't like composing your photos by holding the camera at arms length and looking at the LCD screen, there's also another way of framing your shots. You can buy an optional, completely removable optical viewfinder, the Ricoh GV-2 Mini External Viewfinder, which slots into the hot-shoe on top of the camera, allowing you to hold the camera up to your eye and instantly giving the GR III the feel of a single-lens reflex camera.
The Ricoh GR III has a range of focusing and metering modes that should cover most situations. On the focusing side, the focus modes include Auto-area AF, Zone AF, Select AF, Pinpoint AF, Tracking AF, Continuous AF, Manual Focus, Snap mode (can be changed to focus at either 1m, 1.5m, 2.5m, 5m or Infinity) and Infinity.
The GR III uses a contrast and phase-detection Hybrid AF system for the first time on a GR-series camera, which in theory promises to improve the speed and accuracy of the autofocus. We say in theory, though, because in practice the GR III is still a little on the slow side, despite the technological advances. The AF system often took took almost a second to find and lock onto the subject in single AF point mode, and even worse, sometimes it failed to lock on at all, even in lighting conditions that wouldn't trouble most other modern cameras.
 |
| The Ricoh GR III's Optional Optical Viewfinder |
Face AF worked more quickly and reliably, although there's no Eye AF as on most other recent cameras of this ilk. Continuous AF is also included for the first time, and it worked pretty well at tracking both slow and quicker moving subjects, although strangely you can't use the Face Detect and Continuous AF modes at the same time, which rather limits tracking moving people.
The Full Press Snap option takes a photo at one of the Snap mode distances with a full press of the shutter button. This means that you can use both the camera's auto-focus system by half-pressing the shutter button, and over-ride it to instantly shoot at at a pre-determined distance without having to wait for the camera to focus.
The GR III now offers a macro shooting capability with a minimum focusing distance of 6 centimeters, impressive given the size of the sensor, making it capable of capturing impressive close-up shots with lots of background blur, if so desired.
In terms of metering, the multi-segment metering mode is 256 segment, and there's also center-weighted, spot and the new highlight-weighted metering, which as the name suggests prioritises getting the exposure right for the highlight parts of the image.
The AF function button/lever on the rear of the GR II which was used to toggle between AEL/AFL and the Continuous AF (C-AF) mode has instead been replaced by a customisable FN button on the GR II, simplifying the design but losing some functionality. By default the Fn engages AE/AF lock, but can be changed to a different function.
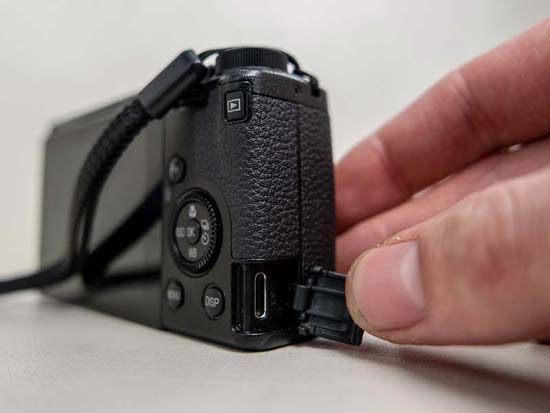 |
| The Ricoh GR III's USB Port |
The electronic leveler is a neat feature that helps to ensure level shots while viewing through the LCD monitor, both in landscape and portrait mode. You can view the horizontal and vertical indicators on the LCD monitor to ensure that shots are aligned along each axis. If you're using the external viewfinder, or can't see the LCD screen in very bright sunlight, then the camera can also be set to make a sound to indicate a level horizon. It doesn't sound like a big deal in theory, but in practice it really helps to make all those wide-angle shots perfectly level.
The Depth of field indicator is an equally useful function. If you set the GR III to either Manual or Aperture priority mode, and the Focus mode to Snap, Manual or Infinity, a vertical scale on the left of the LCD screen indicates the depth-of-field at the current aperture, helping to ensure sharp focus when you're not relying on the camera's auto-focus system.
In addition to Bracketing (exposure, white balance, effects, dynamic range correction, and contrast), Multiple Exposure and Interval Shooting modes, the Interval Composite mode takes a series of images at a fixed interval, then automatically combines the high-luminance pixel data from each images to create a single composite image, useful for quickly and accurately producing star trail images, for example.
The main menu system on the Ricoh GR III is straight-forward to use and is accessed by pressing the Menu button beneath the navigation pad. There are five main menus, Still Image, Movie, Playback, Customize and Setup, each subdivided into a number of screens. It's a fairly logical, very clear system that's an improvement on the GR II.
 |
| The Ricoh GR III's Battery |
The start-up time from turning the Ricoh GR III on to being ready to take a photo is very responsive at around 0.8 second, quicker than the GR II. In terms of image recording, it takes about 0.25 second to store a RAW/JPEG image, allowing you to keep shooting as they are being recorded onto the memory card, and there is virtually no LCD blackout between each image.
Once you have captured a photo, the GR III has a good range of options when it comes to playing, reviewing and managing your images. You can instantly scroll through the images that you have taken, view thumbnails (20 onscreen at once!), zoom in and out up to 16x magnification, view slideshows with audio, set the print order, delete, protect and resize an image. Levels Adjustment allows you to correct the contrast and tone of an image after it has been taken, White Balance Adjustment the white balance, and Color Moire Correction usefully removes any artificial color banding. There's also in-camera RAW Development, with 9 different parameters available.
Images are automatically rotated during playback to fit the current orientation of the camera. Pushing the Adjust dial instantly displays the image at a previously defined magnification, handy for quickly checking focus. The Display button toggles detailed settings information about each picture on and off, such as the ISO rating and aperture / shutter speed, and there is are small histograms available during both shooting and playback. The White Saturation display mode during image playback indicates over-exposed highlights by flashing those areas on and off.
The Ricoh GR III uses a tiny DB-110 rechargeable lithium-ion battery which promises to deliver approximately 200 shots per charge, according to CIPA standards. In practice, though, we managed to take just 140 stills and shoot one very short movie clip on our first outing with the camera before the battery was exhausted, which means that you'll either have to invest in several additional batteries and/or using an external powerbank via the GR III's new USB-C port to get you through a full day's shooting.


No comments:
Post a Comment